Email and Domain Identity Verification in AWS SES
Email Address based Identity
- Navigate to Amazon SES console.
- From the navigation pane, choose Identities.
- Click on Create Identity.
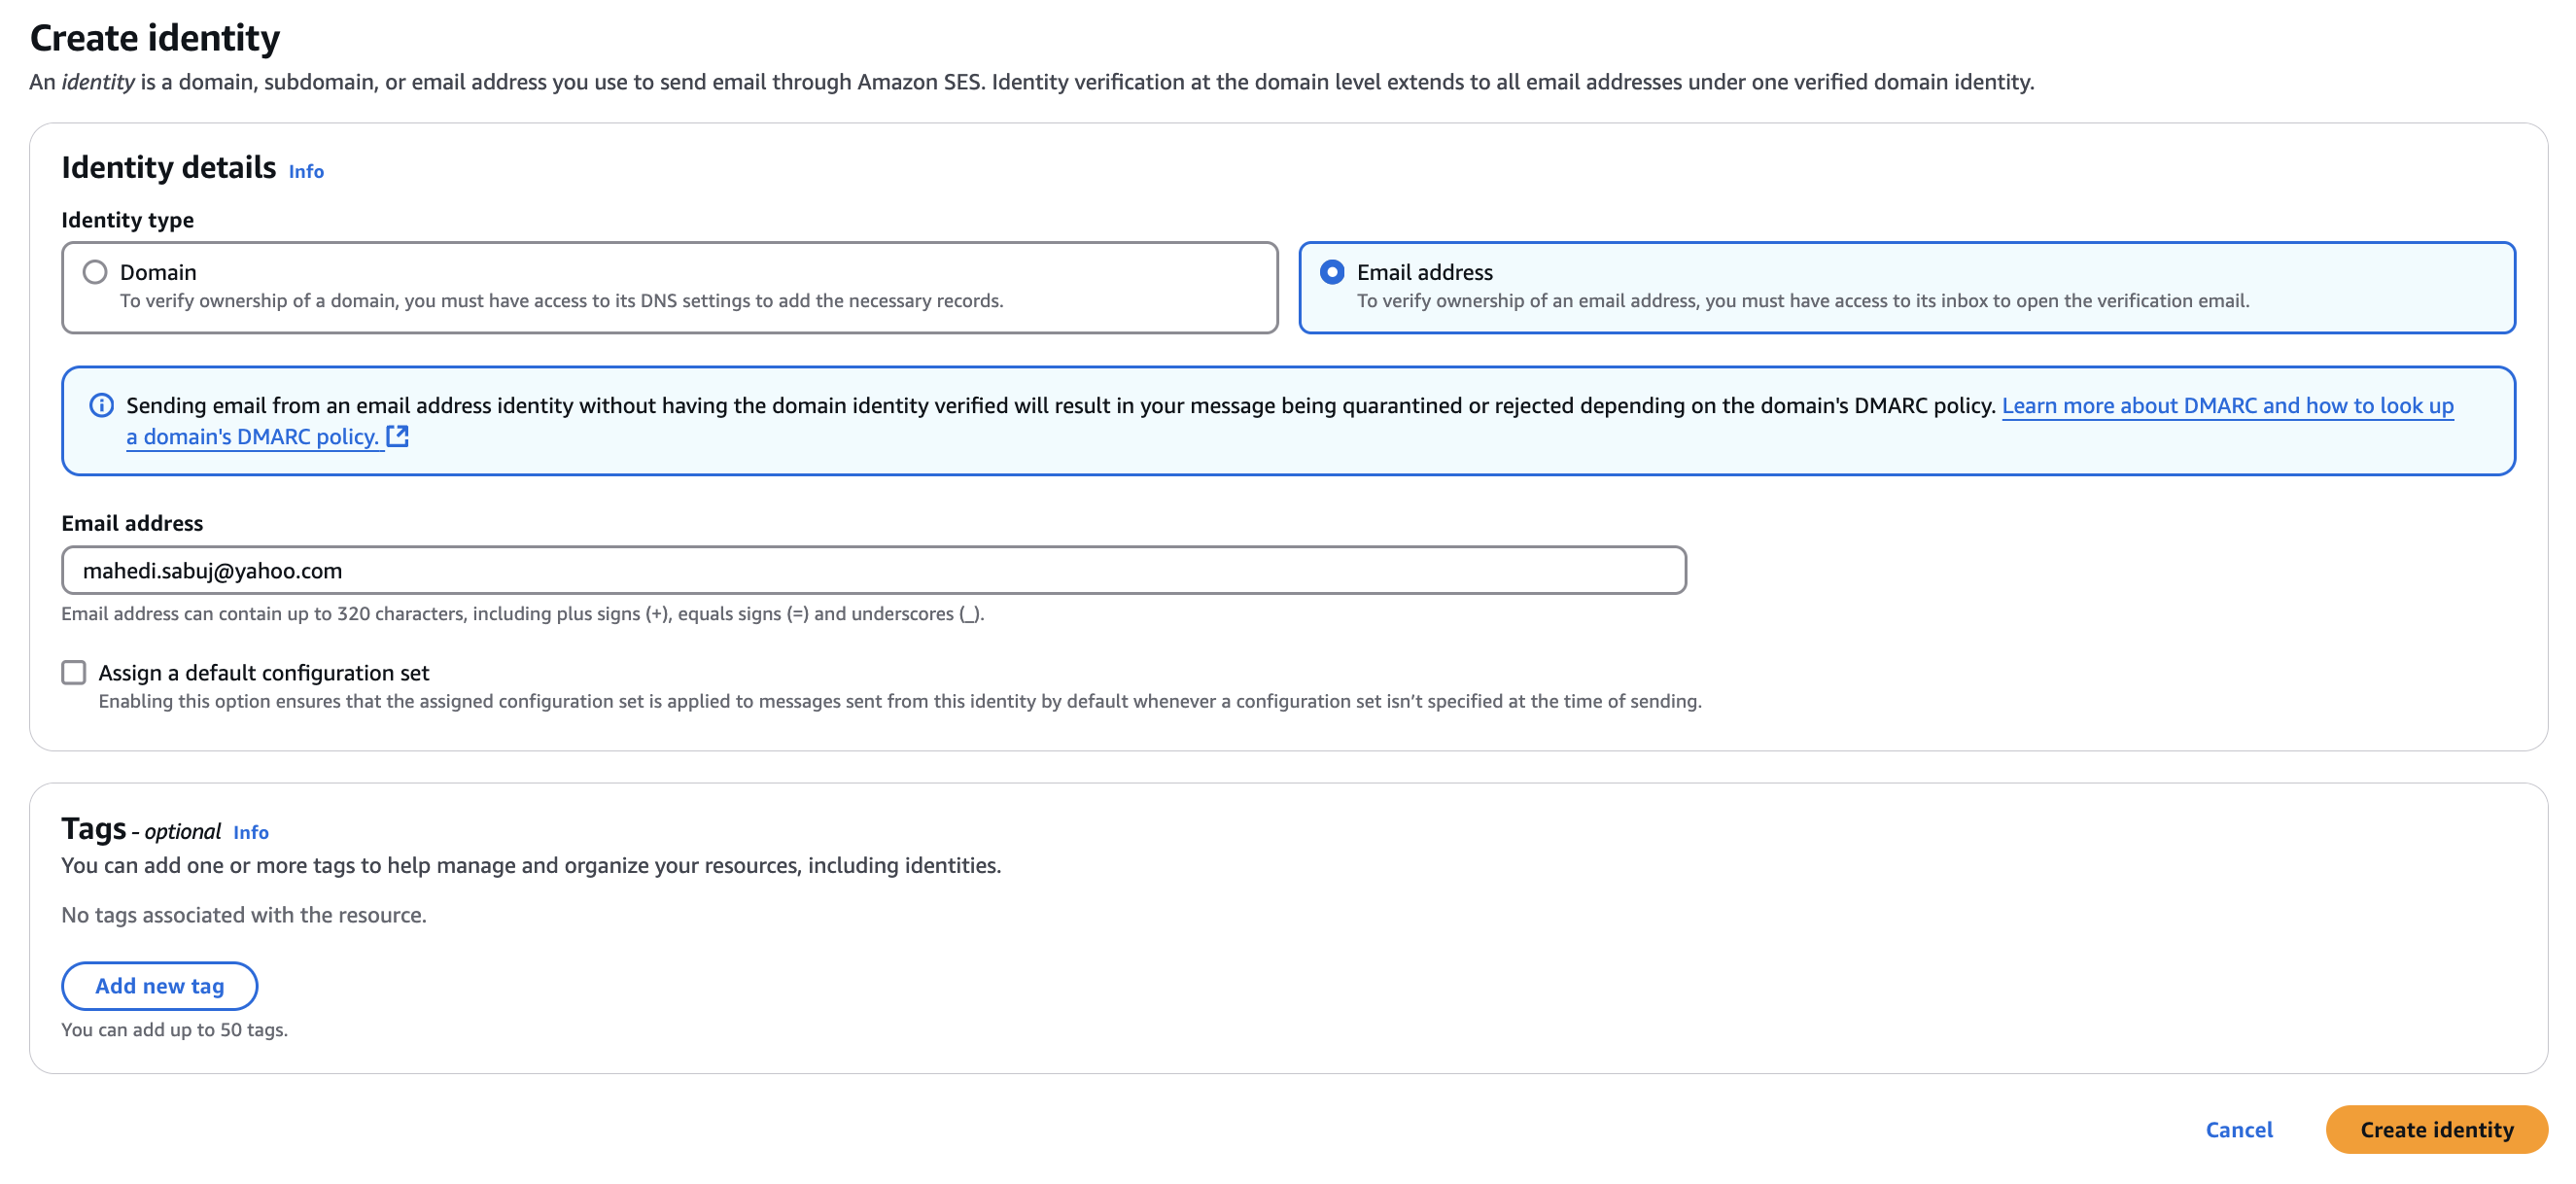
- Under Identity details, choose Email address as the identity type.
- For Email address, enter the email address that you want to use. The email address must be an address that's able to receive mail and you have access.

- Click on Create Identity. After it's created, you should receive a verification email. Open the email from inbox and click the link to complete the verification process for the email address.
Domain based Identity
- Navigate to Amazon SES console.
- From the navigation pane, choose Identities.
- Click on Create Identity.
- Under Identity details, choose Domain as the identity type.
- For Domain, enter the domain name that you want to use. You must have access to the domain's DNS settings to complete the domain verification process.

- To use custom MAIL FROM Domain, select the check box and complete the following steps:
- Enter the subdomain name that you want to use as the MAIL FROM Domain.
- Configure MX failure behavior to define how Amazon SES handles missing MX records at the time of sending. You can either allow SES to fallback to subdomain of amazonses.com or reject the message, triggering
MailFromDomainNotVerifiederror.

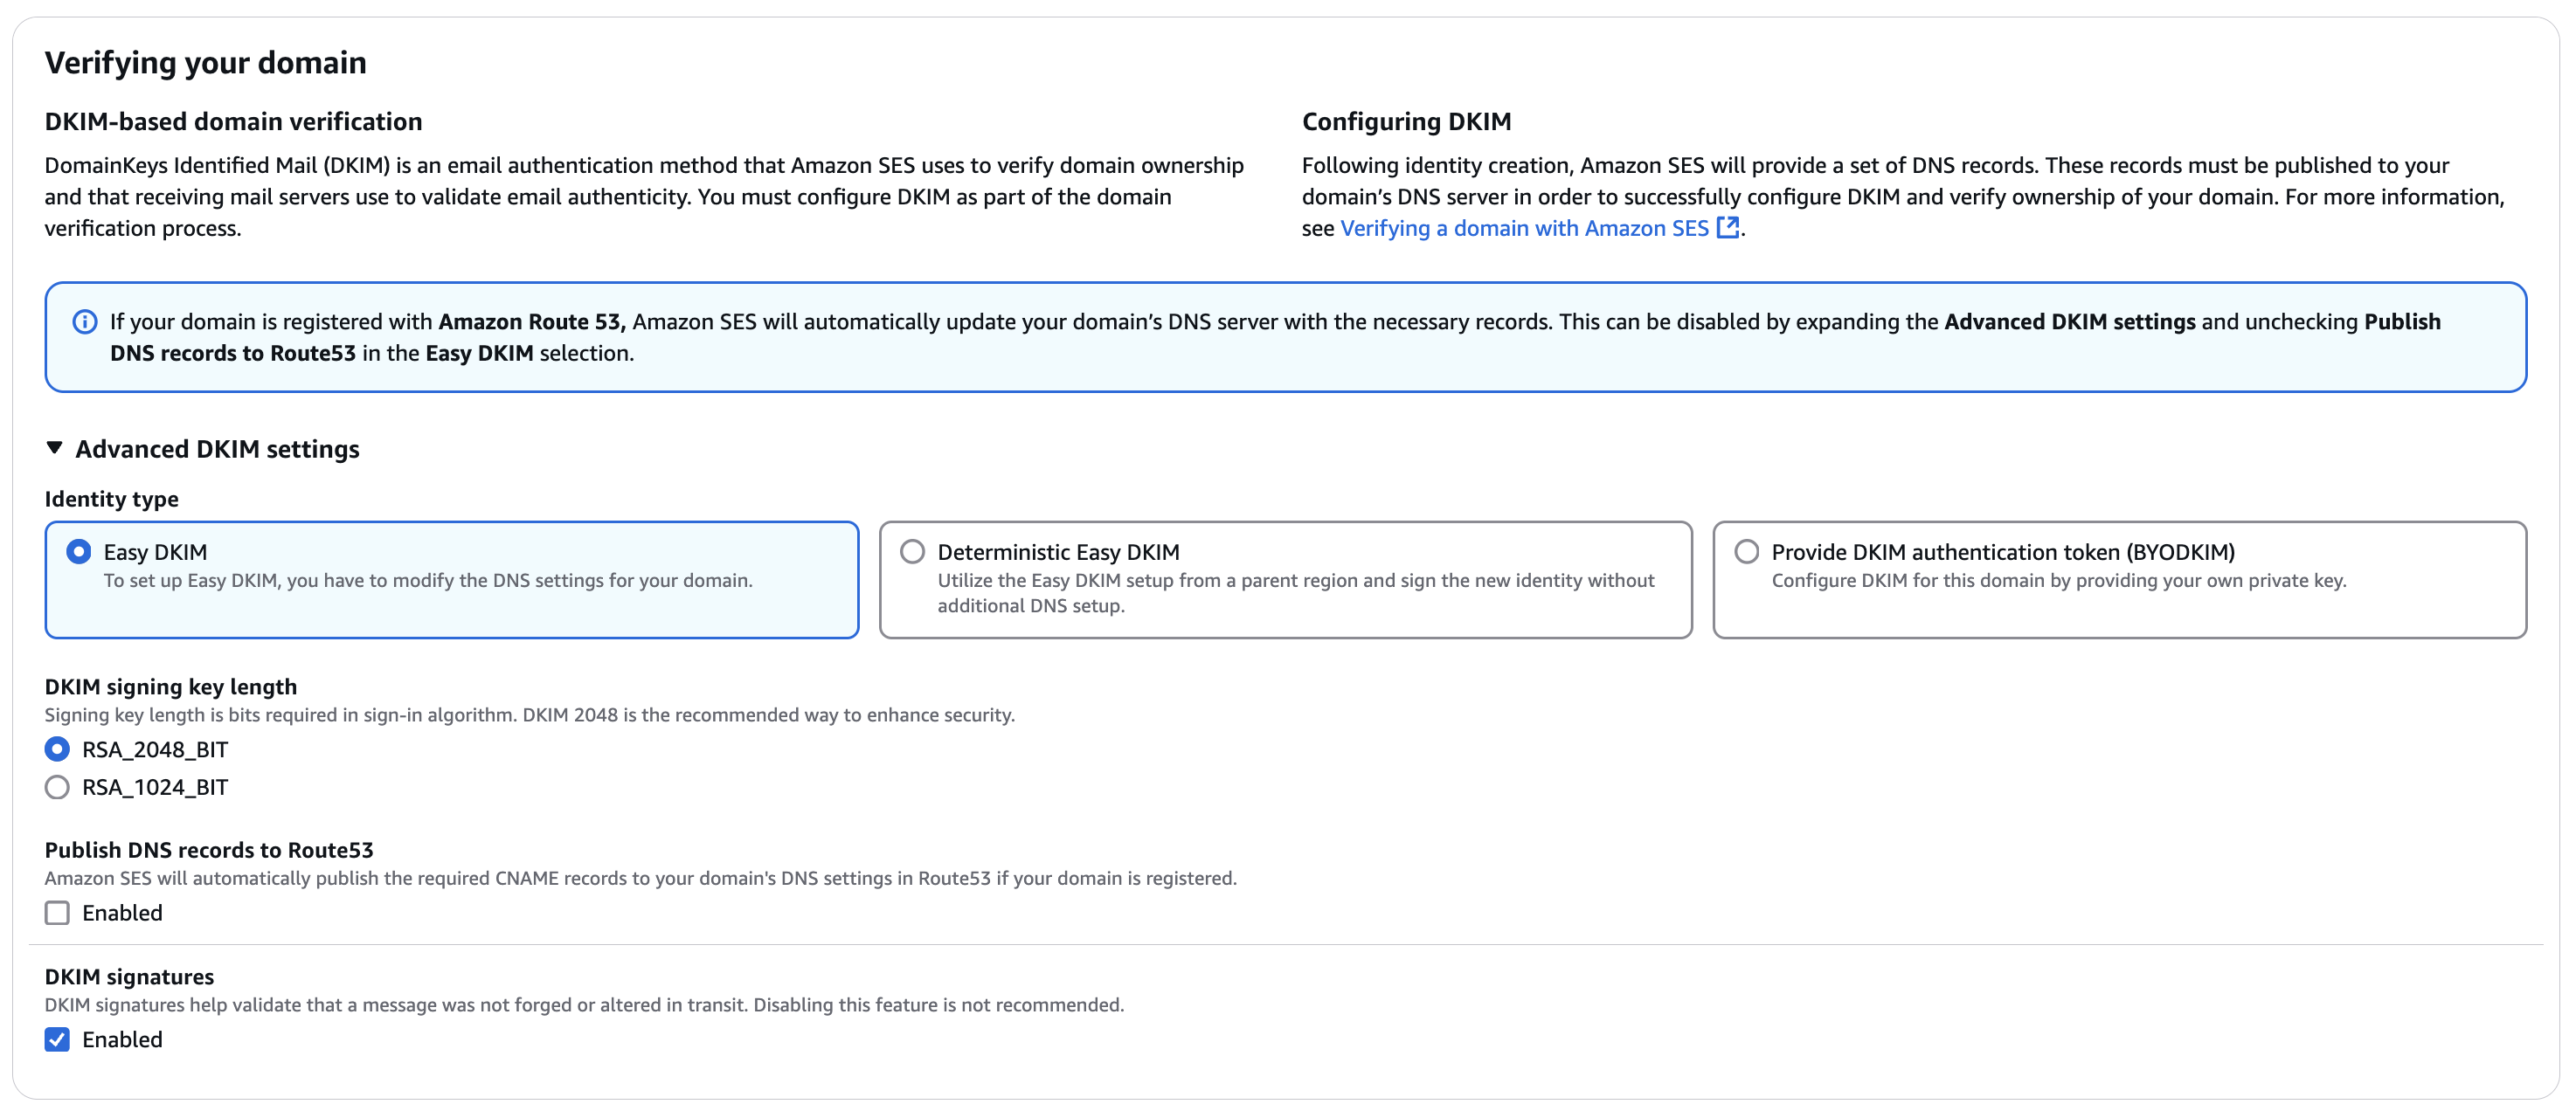
- SES uses Easy DKIM with 2048 bit singing length by default. To customize, expand Advanced DKIM settings and choose the desired DKIM type. Ensure that the Enabled box is checked in the DKIM signatures field.
- To use Deterministic Easy DKIM (DEED) in Amazon SES, you must first enable Easy DKIM for at least one domain. After that, DEED can be used for additional domains without requiring separate DKIM record configurations.
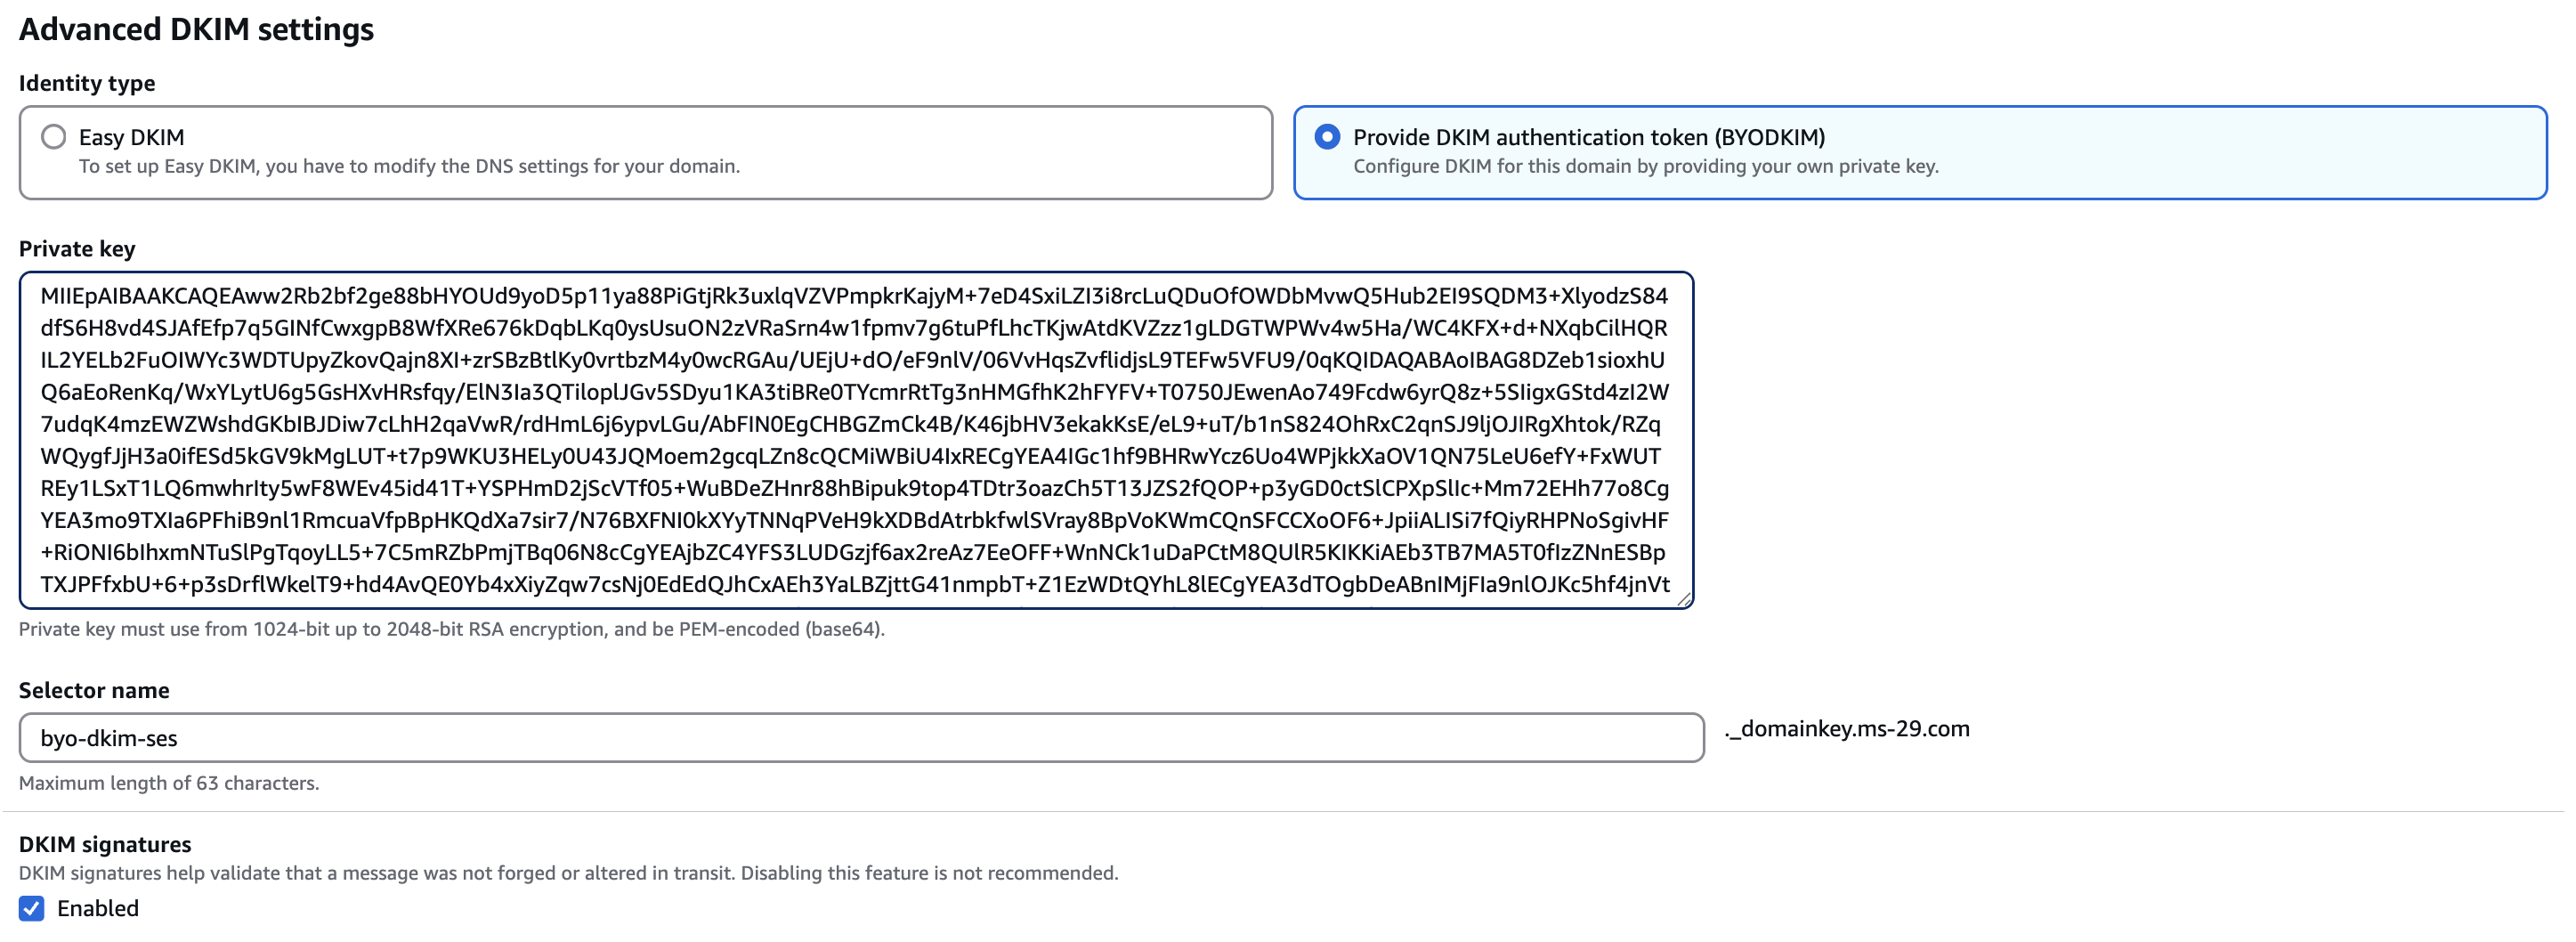
- As an alternative to using Easy DKIM, you can instead configure DKIM authentication by using your own public-private key pair. This process is known as Bring Your Own DKIM (BYODKIM).
 To use Bring Your Own DKIM feature, you first have to create an RSA key pair. To generate a key pair, follow the steps below:
- Open a terminal window and run the following command to generate the private key:
openssl genrsa -f4 -out private.key 2048 - Run the following command to generate the public key:
openssl rsa -in private.key -outform PEM -pubout -out public.key
p=prefix in the DNS record. Paste the private key you generated earlier and specify the selector name you used in the DNS settings. The selector is a string that uniquely identifies the public key in the DNS records.
- Click on Create Identity. Once created, you will see the required DNS records that you need to add to your domain's DNS settings.
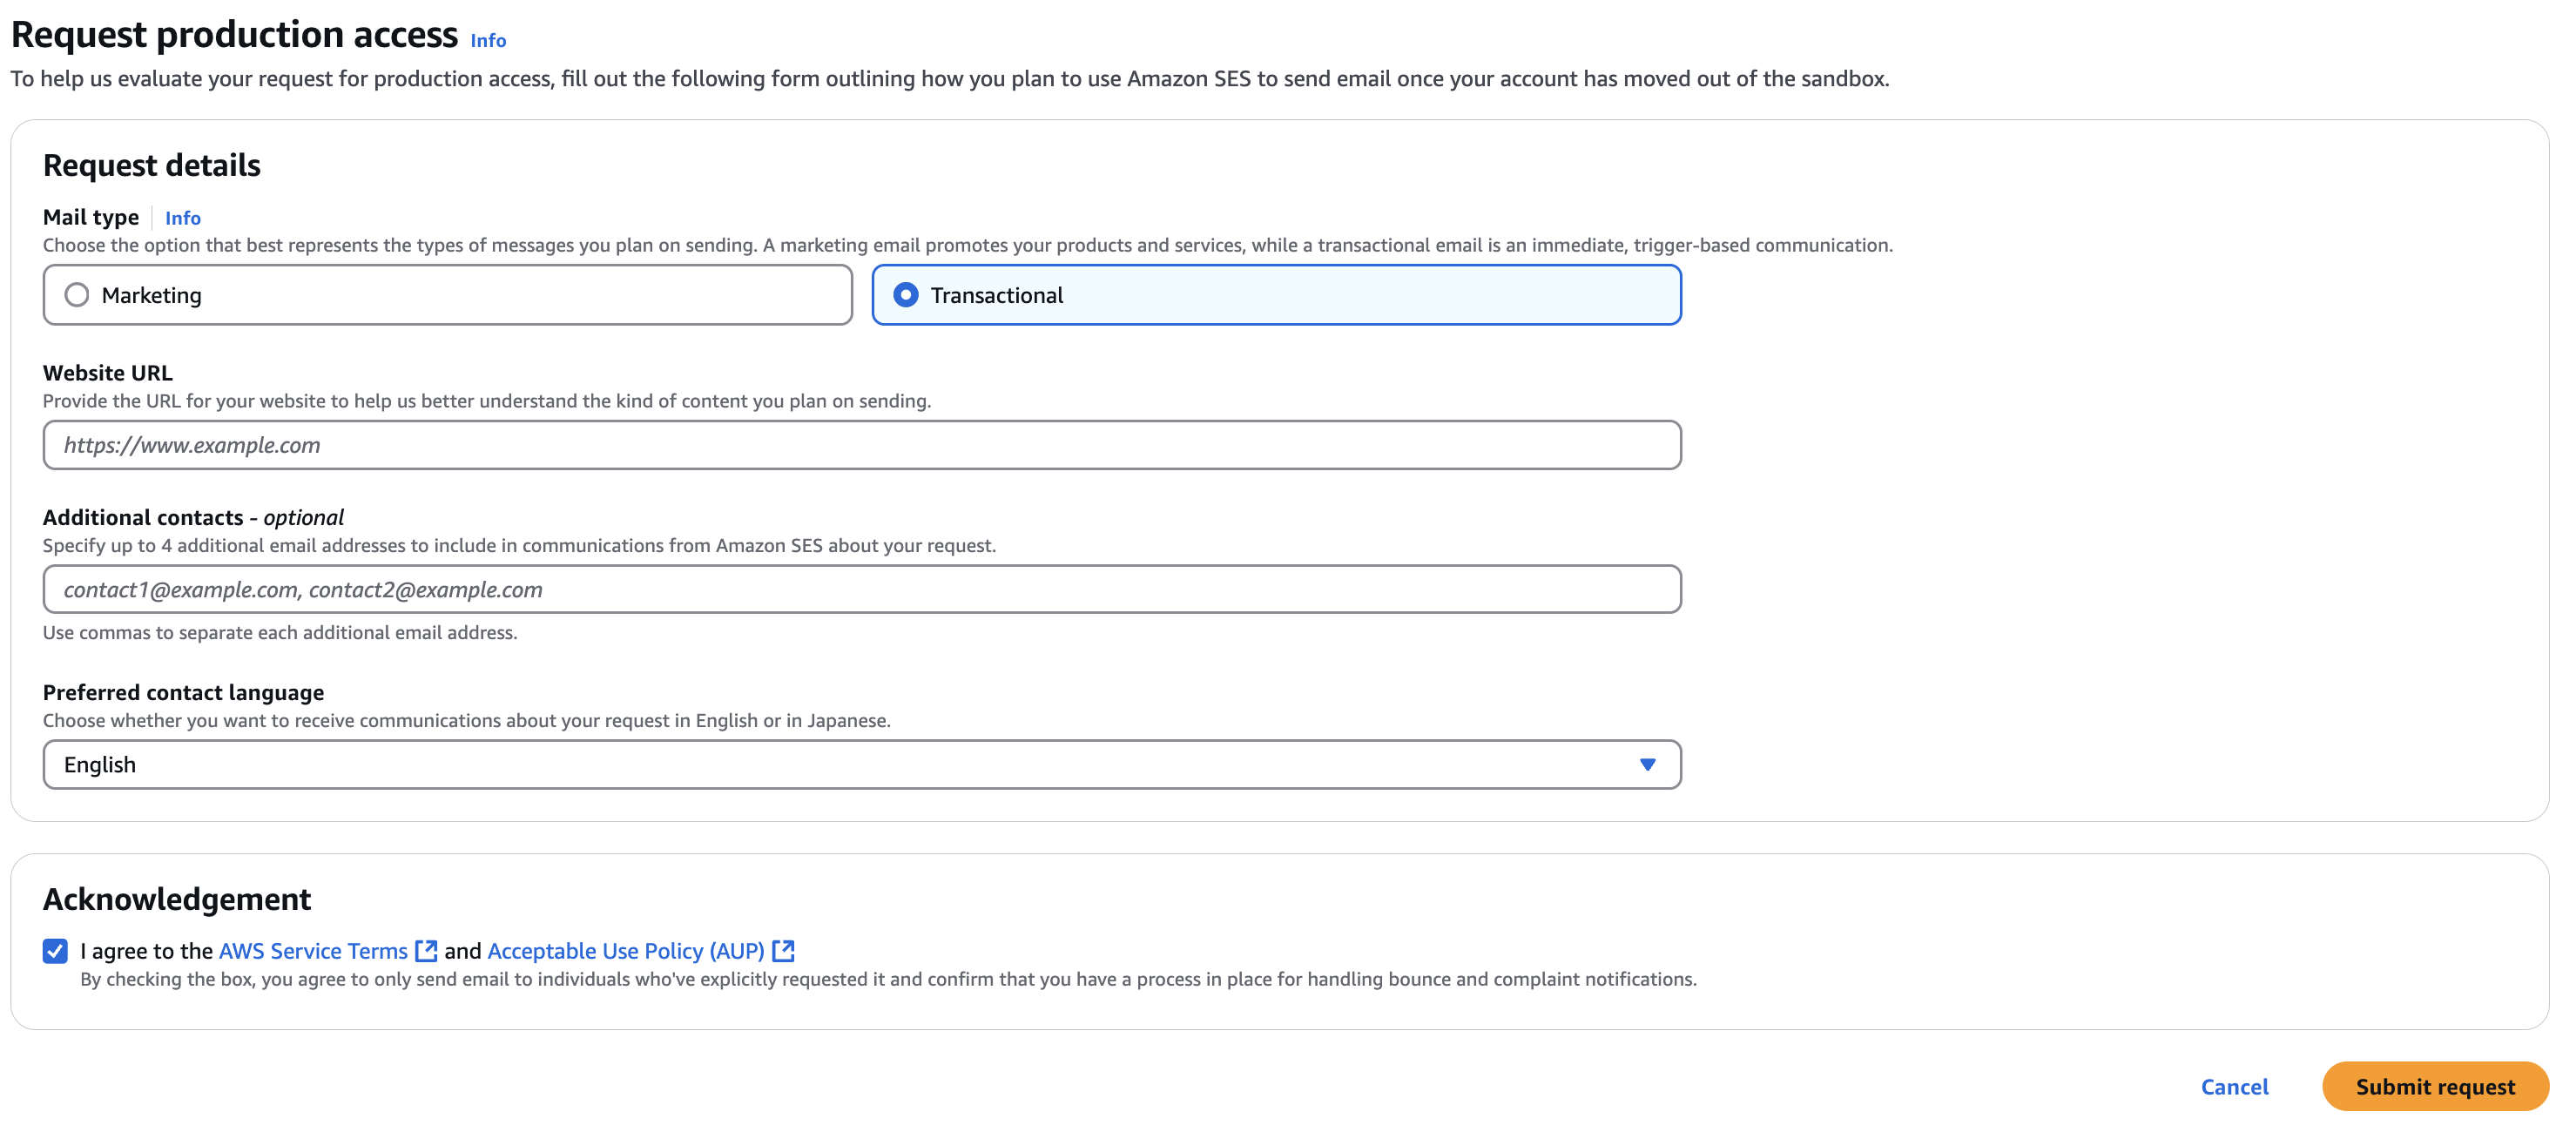
info@your-domain.com). However, if your SES account is still in sandbox mode, emails can only be sent to verified recipient addresses.Amazon SES Production Access
